Resize Photo Image Howto
This program will prompt you to install Sun Microsystems "Java Web Start" if it does not exist on your machine the first time you attempt to run easyPhoto. Please click OK to install.Step 1 Click on the easyPhoto link
Your Browser must be Java capable to run this software
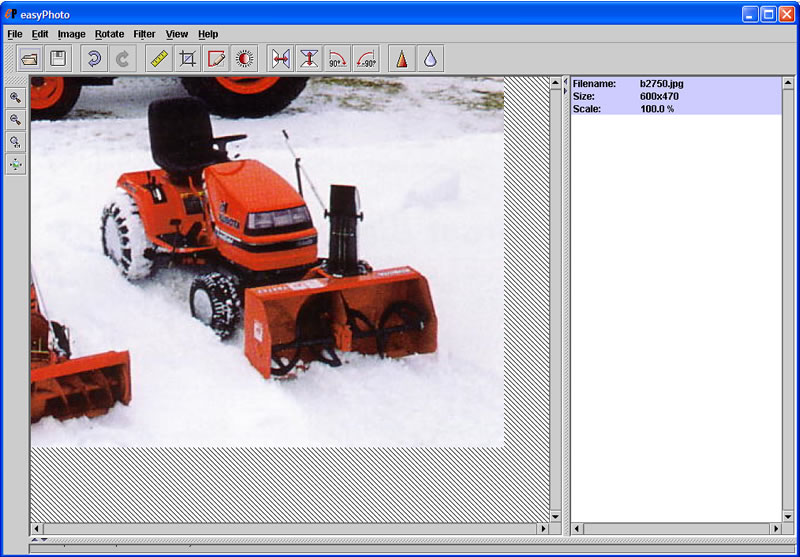
Step 2 Open your photo
Click on File, Open and locate your photo.
When looking for your file be sure to change the "Files of Type" to the correct type (jpg), or choose "all picture types".

Step 3 Resize
Now that your image is loaded, click on "Image", then "Size".
You should select a size of no wider than 600, make sure the "Constrain Proportions" box is checked, allow the software to automatically calculate the other dimension, do allow any dimension to be higher than 600

Step 4 Save and RESIZE the new Image
Save the image by clicking "File", then "Save As".
RESIZE the image my using the BAR (circled in RED) on the right side, set it so that the picture is 30k in size, if it is blurry start the process over and choose a sze smaller than 600 in step 3
Be sure to select "JPEG" as the "Save as Type" in the dialog box.
Also select a different name for the file so you don't over write your original.
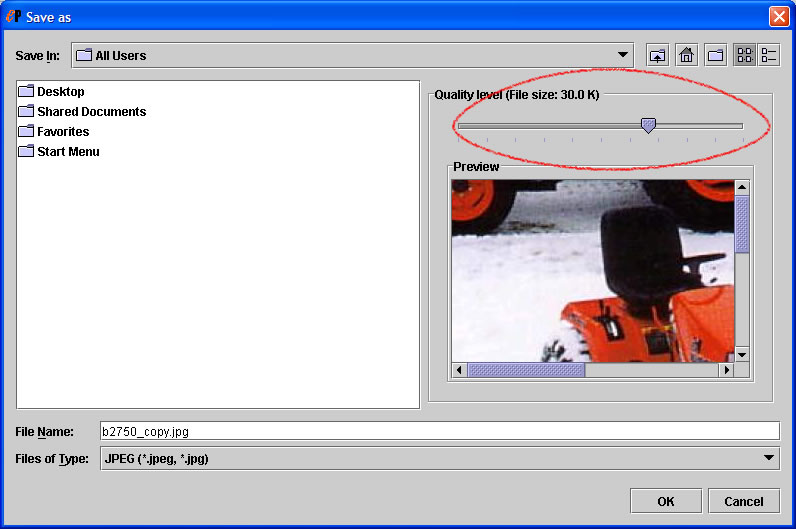
Then repeat Step 1 to 4 as needed to obtain a photo of the correct size and clarity.
More easyPhoto Documentation
Using easyPHOTOeasyPHOTO - step by step
Step 1 - installation
Installing easyPHOTO is not complicated. You simply chose "Click to run easyPHOTO" link above. easyPHOTO works under any operating system (Windows, Mac, Linux, etc). The only pre-requirement is installing a free of charge Virtual Engine JAVA.
Step 2 - using the menu
The application has numerous practical facilities to make the operation of the programme easy and quick!
On every stage of your operation remember about:
Option: FILE
Option: EDIT
Thanks to sub-options:
Option: IMAGE
catch as catch can, thanks to sub-options:
Option: FLIP, or ...
... vertigo with easyPHOTO: